Linux Capabilities: A Beginner's Overview
Moving from Root Dominance to Precise Capability Allocation
Working as a solutions architect while going deep on Kubernetes security — prevention-first thinking, open source tooling, and a daily rabbit hole of hands-on learning. I make the mistakes, then figure out how to fix them (eventually).
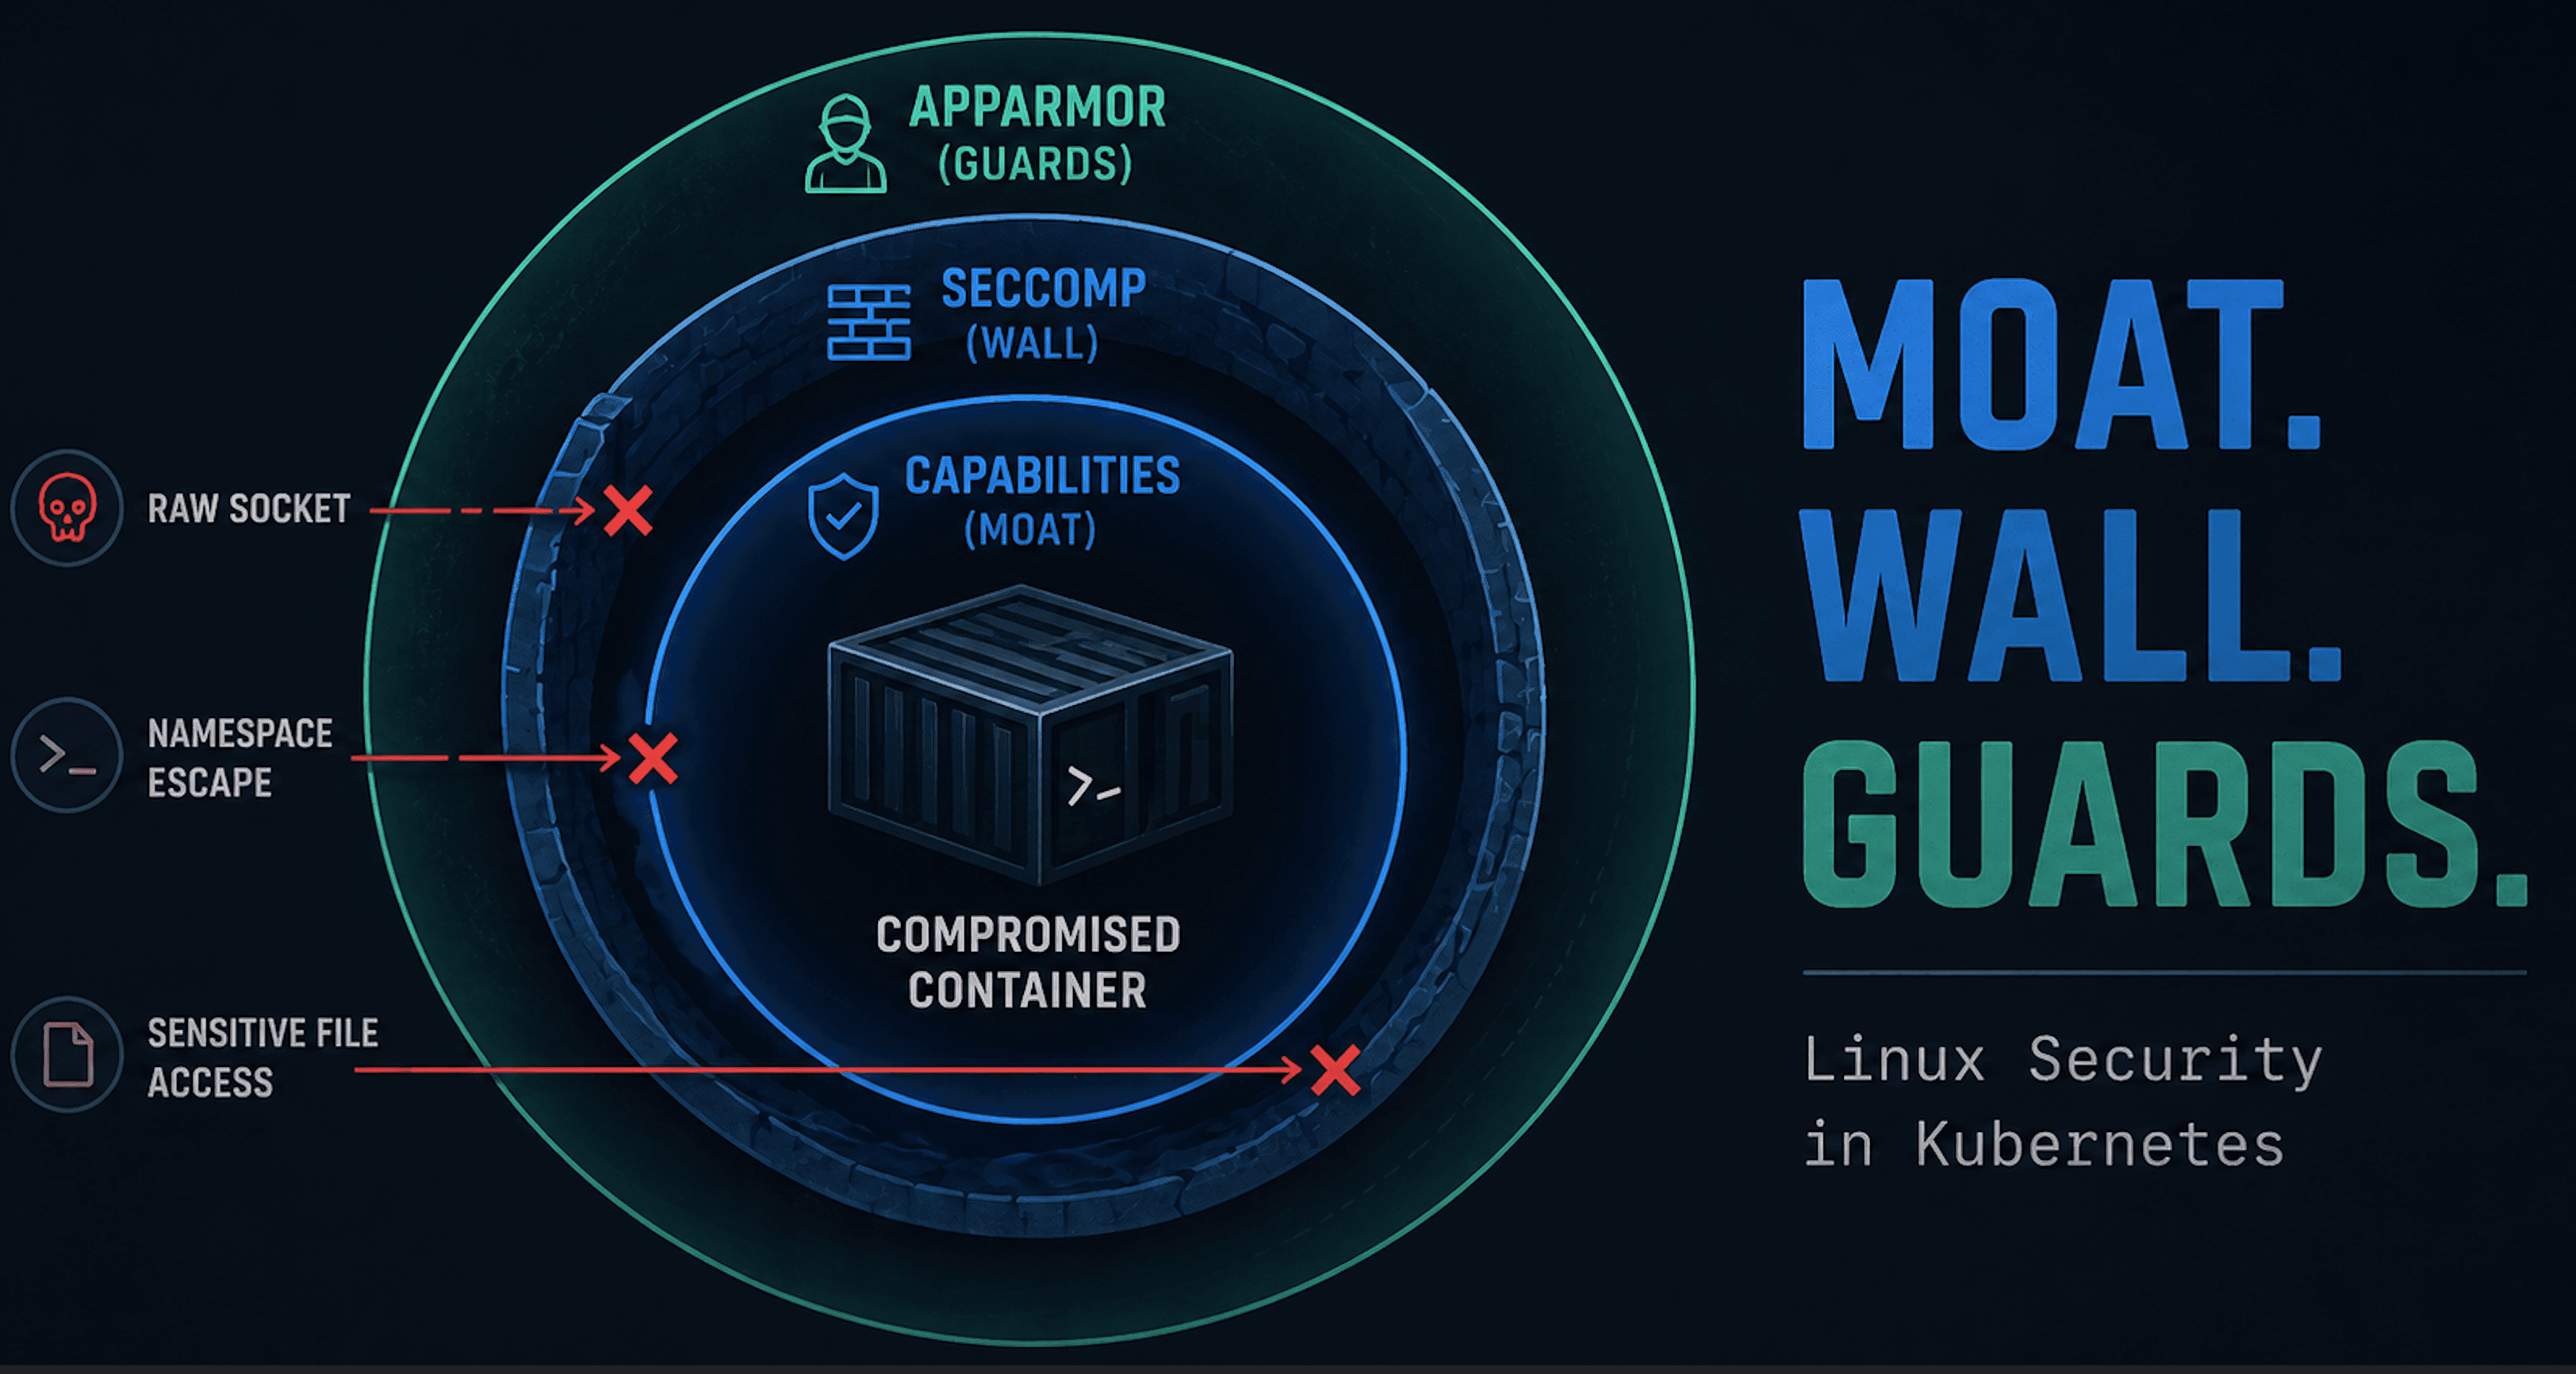
Over the past few months, I’ve been testing root and non-root containers. Naturally, that led me deep into the Kubernetes securityContext: options for both pods and containers. There’s a lot packed into that field. And a handful of particularly interesting knobs that stand out:
- Linux Security Modules (LSMs)
- Capabilities
- Seccomp
But here’s the thing: all of these are just Linux. Kubernetes is merely surfacing functionality the kernel has had for decades.
I’ve already gone down the LSM rabbit hole. In that post, I focused on AppArmor. And for now, I’m resisting the urge to dive into SELinux or SMACK. So let’s call that part of the journey complete for now.
Now it’s time to explore Linux capabilities. They’re surprisingly simple once you understand the model. You can dive deep in the man page. It starts like this:
“Traditional UNIX implementations distinguish two categories of processes: privileged processes (whose effective user ID is 0, referred to as superuser or root), and unprivileged processes (whose effective UID is nonzero).
Privileged processes bypass all kernel permission checks, while unprivileged processes are subject to full permission checking based on the process's credentials.”
So where do capabilities come into play?
“Starting with Linux 2.2, Linux divides the privileges traditionally associated with superuser into distinct units, known as capabilities.”
And you can see the difference right in the kernel source.
In Linux 2.0.40, there’s no mention of capabilities at all — just hardcoded UID checks like if (!suser()) return -EPERM;. But by Linux 2.2.22, fs/open.c has been rewritten to use checks like !capable(CAP_SYS_CHROOT), showing the shift to fine-grained privilege control.
So here's the reality. In modern Linux, we shouldn’t limit risk management to root alone, because privilege isn’t binary anymore. It’s been split into a collection of discrete powers, each represented by a capability. And if you don’t understand which ones your process holds, you might not fully understand what it can actually do.
For example:
CAP_NET_RAW: allow raw socketsCAP_SYS_ADMIN: let's say a lotCAP_SYS_PTRACE: ptrace() of any processCAP_DAC_OVERRIDE: override all DAC access
Security should involve an understanding of what your workloads are already allowed to do, and what the kernel will or won’t stop. Let’s talk about Linux capabilities.
What Are Linux Capabilities, Really?
Before Linux had capabilities, privilege was binary: you were either root (UID 0) and could do everything. Otherwise you weren’t, and got EPERM. Every privileged syscall like mount(), ptrace(), or chown() used a hardcoded check. Capabilities don’t prevent a process from making a syscall, but they do decide whether the kernel allows it to succeed.
Deep Dive
In pre-capabilities Linux (like 2.0.40), the logic behind privileged syscalls like setgid() was straightforward. In this model, if you weren’t root, you could only change your effective group ID to match your real or saved group. Anything else returned a good old-fashioned -EPERM.
asmlinkage int sys_setgid(gid_t gid)
{
    int old_egid = current->egid;

    if (suser())
        current->gid = current->egid = current->sgid = current->fsgid = gid;
    else if ((gid == current->gid) || (gid == current->sgid))
        current->egid = current->fsgid = gid;
    else
        return -EPERM;
    if (current->egid != old_egid)
        current->dumpable = 0;
    return 0;
}
So if you were root, you could change your group IDs freely. If not, you could only change your effective group ID to match your real or saved group. Otherwise? You got a good old-fashioned -EPERM.
Fast forward to 2.2.24 and it is still simple, but just drops super user for capabilities:
asmlinkage int sys_setgid(gid_t gid)
{
    int old_egid = current->egid;

    if (capable(CAP_SETGID))
        current->gid = current->egid = current->sgid = current->fsgid = gid;
    else if ((gid == current->gid) || (gid == current->sgid))
        current->egid = current->fsgid = gid;
    else
        return -EPERM;

    if (current->egid != old_egid)
        current->dumpable = 0;
    return 0;
}
Fast forward to the newest version and it gets more complicated, so we'll avoid that.
The Root Problem
The old model had no concept of “just enough privilege.” If you wanted to let a program:
- Bind to a port below 1024 (
bind()) - Run
ping(requires raw socket access) - Trace another process (
ptrace())
You had to give it full root, which meant total control over the system. Not ideal.
Available Capabilities
There are currently 41 capabilities in Linux defined in two sources:
man 7 capabilities- human-readable descriptionsinclude/uapi/linux/capability.h- actual definitions in the kernel
Example from the header file:
/* Allow ioperm/iopl access */
/* Allow sending USB messages to any device via /dev/bus/usb */

#define CAP_SYS_RAWIO        17

/* Allow use of chroot() */

#define CAP_SYS_CHROOT       18

/* Allow ptrace() of any process */

#define CAP_SYS_PTRACE       19
These header definitions are used throughout the kernel wherever permission checks are needed. You’ll see them pop up in everything from mount() to chroot().
More Than Just On or Off
Capabilities aren’t just a binary “has it / doesn’t have it.” When a process runs, the kernel keeps several capability sets that define not only what’s possible, but what’s actually in effect. This is a high level overview of what these are.
| Set | What It Controls |
| Permitted | The menu of capabilities the process may make effective or inheritable. |
| Effective | The subset currently in use, what the process is actively wielding right now. |
| Inheritable | Capabilities the process can pass along to child processes during execve(). |
| Bounding | The hard ceiling, if it’s not here, it can never be granted later, even to root. |
| Ambient | Lets certain capabilities stick around across execve() for non-root processes. |
You can check a running process’s capabilities with:
grep Cap /proc/$$/status
For a friendlier view (with names instead of hex):
capsh --print
Practical Example with CAP_NET_BIND_SERVICE
Let's walk through our capabilities with low port bindings. We'll try to set a service to bind to a port below 1024. Let's start with a simple C app that we'll call bind_low_port. This app will simply try to bind, not run anything persistent. Here is the app:
// bind_low_port.c
#include <stdio.h>
#include <stdlib.h>
#include <string.h>
#include <unistd.h>
#include <errno.h>
#include <netinet/in.h>
#include <sys/socket.h>

int main() {
    int sockfd;
    struct sockaddr_in addr;

    sockfd = socket(AF_INET, SOCK_STREAM, 0);
    if (sockfd == -1) {
        perror("socket");
        return 1;
    }

    memset(&addr, 0, sizeof(addr));
    addr.sin_family = AF_INET;
    addr.sin_addr.s_addr = htonl(INADDR_ANY);
    addr.sin_port = htons(80); // Privileged port (<1024)

    if (bind(sockfd, (struct sockaddr *)&addr, sizeof(addr)) < 0) {
        perror("bind");
        return 1;
    }

    printf("Successfully bound to port 80\n");
    close(sockfd);
    return 0;
}
Go ahead and compile that and drop it into /usr/local/bin:
sudo gcc -o /usr/local/bin/bind_low_port bind_low_port.c
sudo chmod +x /usr/local/bin/bind_low_port bind_low_port.c
Now the app is ready to go!
Run as Root
Now let's rewind to the pre-capabilities days. We need to make sure we are root to get this to work so let's create a service to run as root! Save the following as bind-root.service.
[Unit]
Description=Bind to port 80 as root

[Service]
ExecStart=/usr/local/bin/bind_low_port
User=root

[Install]
WantedBy=multi-user.target
Copy it into our systemd directory, enable it, start it, and check status:
sudo cp bind-root.service /etc/systemd/system/
sudo systemctl daemon-reexec
sudo systemctl daemon-reload
sudo systemctl start bind-root.service
sudo systemctl status bind-root
And you should see:
○ bind-root.service - Bind to port 80 as root
     Loaded: loaded (/etc/systemd/system/bind-root.service; disabled; preset: enabled)
     Active: inactive (dead)

Aug 08 20:32:52 controlplane systemd[1]: Started bind-root.service - Bind to port 80 as root.
Aug 08 20:32:52 controlplane bind_low_port[2400223]: Successfully bound to port 80
Aug 08 20:32:52 controlplane systemd[1]: bind-root.service: Deactivated successfully.
Worked as expected, but not a desirable permission level.
Run with Net Bind Capability
Now let's get to the capabilities world. We no longer need root! Save the following as a bind-captest.service.
[Unit]
Description=Bind to port 80 with CAP_NET_BIND_SERVICE

[Service]
ExecStart=/usr/local/bin/bind_low_port
User=captest
Group=captest
AmbientCapabilities=CAP_NET_BIND_SERVICE
CapabilityBoundingSet=CAP_NET_BIND_SERVICE
NoNewPrivileges=true

[Install]
WantedBy=multi-user.target
We'll need to create this non-privileged user and group.
sudo groupadd --system captest
sudo useradd --system --no-create-home --gid captest captest
Copy it into your systemd directory, enable it, start it, and check status:
sudo cp bind-captest.service /etc/systemd/system/
sudo systemctl daemon-reexec
sudo systemctl daemon-reload
sudo systemctl start bind-captest.service
sudo systemctl status bind-captest
And you should see:
○ bind-captest.service - Bind to port 80 with CAP_NET_BIND_SERVICE
     Loaded: loaded (/etc/systemd/system/bind-captest.service; disabled; preset: enabled)
     Active: inactive (dead)

Aug 08 20:21:13 controlplane systemd[1]: bind-captest.service: Failed with result 'exit-code'.
Aug 08 20:22:13 controlplane systemd[1]: Started bind-captest.service - Bind to port 80 with CAP_NET_BIND_SERVICE.
Aug 08 20:22:13 controlplane bind_low_port[2392163]: Successfully bound to port 80
Aug 08 20:22:13 controlplane systemd[1]: bind-captest.service: Deactivated successfully
Worked as expected and with least privilege. Not too bad.
Run with No Root and No Capability
Again we'll create a service. Save the following as bind-nonroot.service.
[Unit]
Description=Bind to port 80 with no capabilities

[Service]
ExecStart=/usr/local/bin/bind_low_port
User=captest
Group=captest
NoNewPrivileges=true

[Install]
WantedBy=multi-user.target
No need to create the user and group as we did that in the previous step. Copy it into our systemd directory, enable it, start it, and check status:
sudo cp bind-nonroot.service /etc/systemd/system/
sudo systemctl daemon-reexec
sudo systemctl daemon-reload
sudo systemctl start bind-nonroot.service
sudo systemctl status bind-nonroot
And you should see:
× bind-nonroot.service - Bind to port 80 with no capabilities
     Loaded: loaded (/etc/systemd/system/bind-nonroot.service; disabled; preset: enabled)
     Active: failed (Result: exit-code) since Fri 2025-08-08 20:28:15 UTC; 11min ago
   Duration: 4ms
   Main PID: 2396701 (code=exited, status=1/FAILURE)
        CPU: 1ms

Aug 08 20:28:15 controlplane systemd[1]: Started bind-nonroot.service - Bind to port 80 with no capabilities.
Aug 08 20:28:15 controlplane bind_low_port[2396701]: bind: Permission denied
Aug 08 20:28:15 controlplane systemd[1]: bind-nonroot.service: Main process exited, code=exited, status=1/FAILURE
Aug 08 20:28:15 controlplane systemd[1]: bind-nonroot.service: Failed with result 'exit-code'.
Failed just as expected.
So we hit the trifecta. No bonus payout, sadly. Here is a quick recap:
| Service Type | Can Bind Port 80? | Privilege Level | Notes |
| Root | Yes | Full root | Risky: has all powers |
| Non-root + Capability | Yes | Scoped via CAP_NET_BIND_SERVICE | Just enough privilege |
| Non-root, No Capability | No | No elevated privileges | Expected failure (Permission denied) |
Now that we've laid the groundwork, let's dive into something near and dear.
Capabilities in Container Land
Docker Containers
By default, Docker containers run with a reduced set of capabilities, but not empty. Let's create a simple Dockerfile that gives us some tools.
FROM ubuntu:22.04
RUN apt update && apt install -y \
    libcap2-bin \
    strace \
    util-linux \
    iproute2 \
    procps \
    net-tools \
    python3 \
    curl \
    && apt clean
Then create and run in interactive mode:
docker build -t captest .
docker run --rm -it captest
Now let's check our capabilities.
root@12801a8bb3a8:/# capsh --print
Current: cap_chown,cap_dac_override,cap_fowner,cap_fsetid,cap_kill,cap_setgid,cap_setuid,cap_setpcap,cap_net_bind_service,cap_net_raw,cap_sys_chroot,cap_mknod,cap_audit_write,cap_setfcap=ep
Bounding set =cap_chown,cap_dac_override,cap_fowner,cap_fsetid,cap_kill,cap_setgid,cap_setuid,cap_setpcap,cap_net_bind_service,cap_net_raw,cap_sys_chroot,cap_mknod,cap_audit_write,cap_setfcap
Ambient set =
Current IAB: !cap_dac_read_search,!cap_linux_immutable,!cap_net_broadcast,!cap_net_admin,!cap_ipc_lock,!cap_ipc_owner,!cap_sys_module,!cap_sys_rawio,!cap_sys_ptrace,!cap_sys_pacct,!cap_sys_admin,!cap_sys_boot,!cap_sys_nice,!cap_sys_resource,!cap_sys_time,!cap_sys_tty_config,!cap_lease,!cap_audit_control,!cap_mac_override,!cap_mac_admin,!cap_syslog,!cap_wake_alarm,!cap_block_suspend,!cap_audit_read,!cap_perfmon,!cap_bpf,!cap_checkpoint_restore
Securebits: 00/0x0/1'b0
 secure-noroot: no (unlocked)
 secure-no-suid-fixup: no (unlocked)
 secure-keep-caps: no (unlocked)
 secure-no-ambient-raise: no (unlocked)
uid=0(root) euid=0(root)
gid=0(root)
groups=0(root)
Guessed mode: UNCERTAIN (0)
You’ll see things like CAP_NET_BIND_SERVICE, CAP_CHOWN, and CAP_DAC_OVERRIDE still available.
Test something allowed such as CAP_CHOWN:
root@12801a8bb3a8:/# touch testfile && chown nobody:nogroup testfile && ls
bin  boot  dev  etc  home  lib  media  mnt  opt  proc  root  run  sbin  secret  srv  sys  testfile  tmp  usr  var
Test something not allowed such as CAP_NET_ADMIN:
root@12801a8bb3a8:/# ip link add dummy0 type dummy
RTNETLINK answers: Operation not permitted
Exit the container and we can try to drop and add a capability.
docker run --rm -it --cap-drop=CHOWN --cap-add=CAP_NET_ADMIN captest
And now the capabilities have switched:
root@2d6de2b45347:/# touch file
root@2d6de2b45347:/# chown nobody file
chown: changing ownership of 'file': Operation not permitted
root@54e336fcd322:/# ip link add dummy0 type dummy
root@54e336fcd322:/#
That all worked as expected. We've seen the defaults and shown how to add and drop capabilities.
Kubernetes Pods
Let's try the same thing in Kubernetes. Create the following pod definition:
apiVersion: v1
kind: Pod
metadata:
  name: cap-default
spec:
  containers:
  - name: cap-default
    image: ubuntu
    command: ["sleep", "infinity"]
Deploy the pod and exec in:
kubectl apply -f captest-pod.yaml
kubectl exec -it cap-default -- /bin/bash
Install the relevant tools and check the capabilities. They will be as expected from our Docker experiment:
root@cap-default:/# apt update && apt install -y \
    libcap2-bin \
    strace \
    util-linux \
    iproute2 \
    procps \
    net-tools \
    python3 \
    curl \
    && apt clean
root@cap-default:/# capsh --print
Current: cap_chown,cap_dac_override,cap_fowner,cap_fsetid,cap_kill,cap_setgid,cap_setuid,cap_setpcap,cap_net_bind_service,cap_net_raw,cap_sys_chroot,cap_mknod,cap_audit_write,cap_setfcap=ep
Bounding set =cap_chown,cap_dac_override,cap_fowner,cap_fsetid,cap_kill,cap_setgid,cap_setuid,cap_setpcap,cap_net_bind_service,cap_net_raw,cap_sys_chroot,cap_mknod,cap_audit_write,cap_setfcap
Ambient set =
Current IAB: !cap_dac_read_search,!cap_linux_immutable,!cap_net_broadcast,!cap_net_admin,!cap_ipc_lock,!cap_ipc_owner,!cap_sys_module,!cap_sys_rawio,!cap_sys_ptrace,!cap_sys_pacct,!cap_sys_admin,!cap_sys_boot,!cap_sys_nice,!cap_sys_resource,!cap_sys_time,!cap_sys_tty_config,!cap_lease,!cap_audit_control,!cap_mac_override,!cap_mac_admin,!cap_syslog,!cap_wake_alarm,!cap_block_suspend,!cap_audit_read,!cap_perfmon,!cap_bpf,!cap_checkpoint_restore
Securebits: 00/0x0/1'b0 (no-new-privs=0)
 secure-noroot: no (unlocked)
 secure-no-suid-fixup: no (unlocked)
 secure-keep-caps: no (unlocked)
 secure-no-ambient-raise: no (unlocked)
uid=0(root) euid=0(root)
gid=0(root)
groups=0(root)
Guessed mode: HYBRID (4)
Now let's change the pod definition to add and drop capabilities. Here is our new definition:
apiVersion: v1
kind: Pod
metadata:
  name: cap-custom
spec:
  containers:
  - name: cap-custom
    image: ubuntu:22.04
    command: ["sleep", "infinity"]
    securityContext:
      capabilities:
        drop:
        - CHOWN
        add:
        - NET_ADMIN
Deploy the pod and exec in:
kubectl apply -f cap-custom.yaml
kubectl exec -it cap-custom -- /bin/bash
Install the relevant tools and check the capabilities. They will be as expected from our Docker experiment (you might see a lot of errors due to dropping CAP_CHOWN:
root@cap-custom:/# apt update && apt install -y \
    libcap2-bin \
    strace \
    util-linux \
    iproute2 \
    procps \
    net-tools \
    python3 \
    curl \
    && apt clean
root@cap-custom:/# capsh --print
Current: cap_dac_override,cap_fowner,cap_fsetid,cap_kill,cap_setgid,cap_setuid,cap_setpcap,cap_net_bind_service,cap_net_admin,cap_net_raw,cap_sys_chroot,cap_mknod,cap_audit_write,cap_setfcap=ep
Bounding set =cap_dac_override,cap_fowner,cap_fsetid,cap_kill,cap_setgid,cap_setuid,cap_setpcap,cap_net_bind_service,cap_net_admin,cap_net_raw,cap_sys_chroot,cap_mknod,cap_audit_write,cap_setfcap
Ambient set =
Current IAB: !cap_chown,!cap_dac_read_search,!cap_linux_immutable,!cap_net_broadcast,!cap_ipc_lock,!cap_ipc_owner,!cap_sys_module,!cap_sys_rawio,!cap_sys_ptrace,!cap_sys_pacct,!cap_sys_admin,!cap_sys_boot,!cap_sys_nice,!cap_sys_resource,!cap_sys_time,!cap_sys_tty_config,!cap_lease,!cap_audit_control,!cap_mac_override,!cap_mac_admin,!cap_syslog,!cap_wake_alarm,!cap_block_suspend,!cap_audit_read,!cap_perfmon,!cap_bpf,!cap_checkpoint_restore
Securebits: 00/0x0/1'b0
 secure-noroot: no (unlocked)
 secure-no-suid-fixup: no (unlocked)
 secure-keep-caps: no (unlocked)
 secure-no-ambient-raise: no (unlocked)
uid=0(root) euid=0(root)
gid=0(root)
groups=0(root)
Guessed mode: UNCERTAIN (0)
Our quick tests showed the same rule applies whether you’re running a straight Docker container or running in Kubernetes:
- In Docker, a container running as root starts with a limited set of default capabilities. We proved that if a capability like
CAP_NET_ADMINisn’t present, privileged operations (e.g.,ip link add) fail withOperation not permitted. - In Kubernetes, the
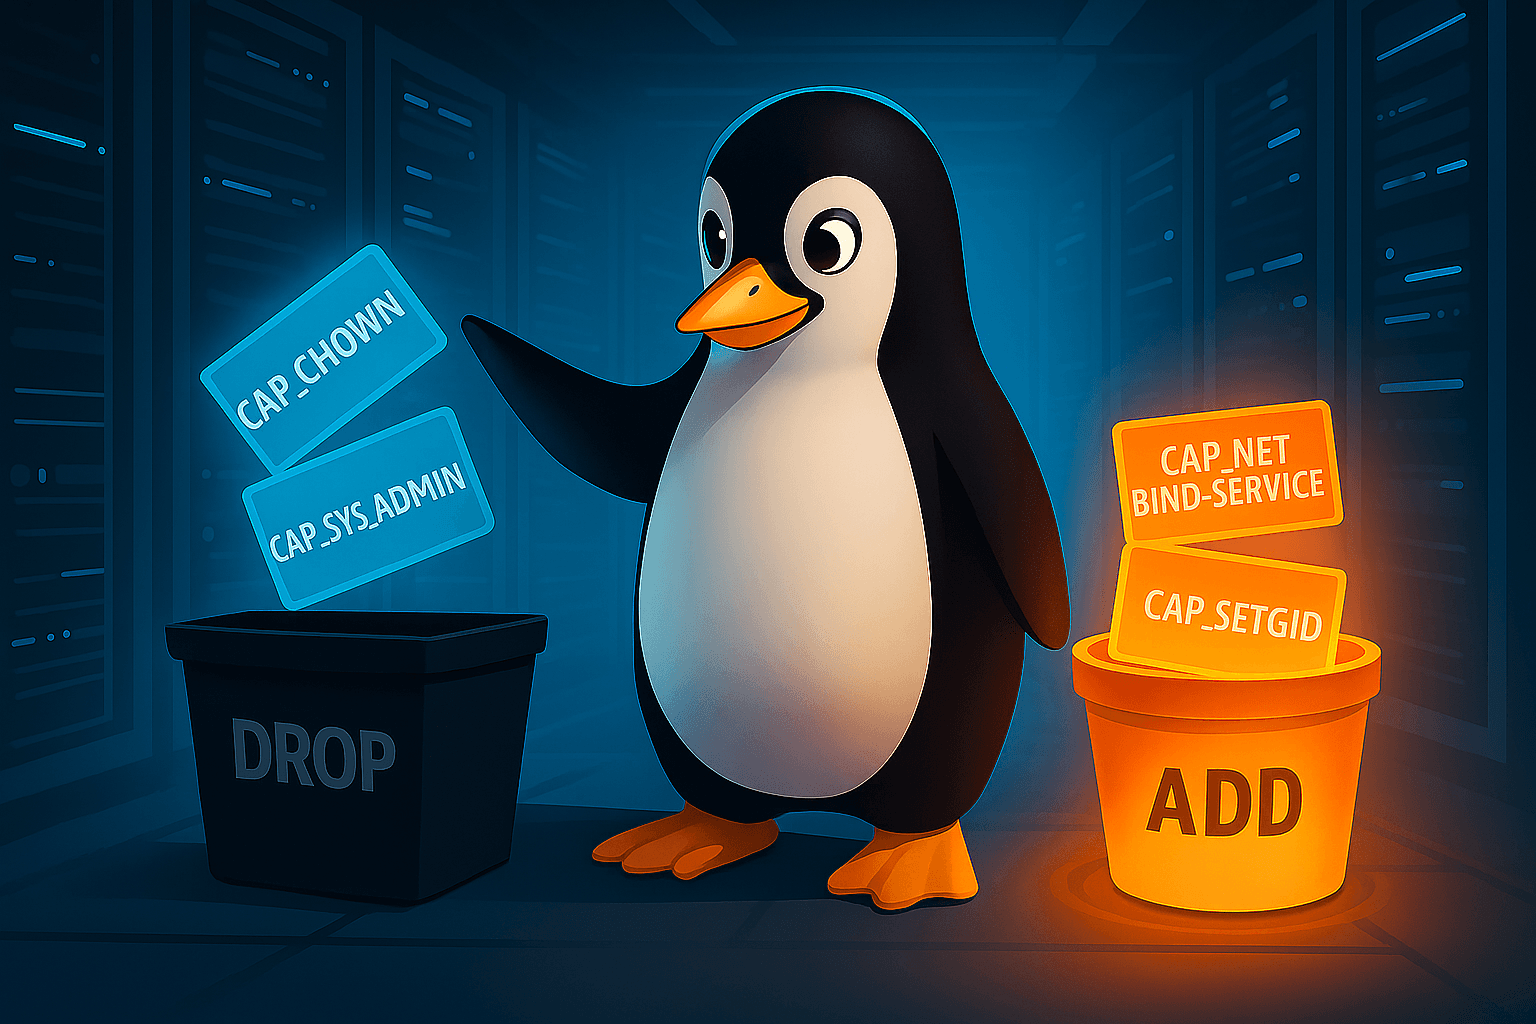
securityContextgives you fine-grained control. You can:- Drop capabilities you don’t want (e.g.,
CAP_CHOWN) to shrink the attack surface, even for root. - Add specific capabilities (e.g.,
CAP_NET_ADMIN) to grant only what’s needed without giving the Pod full root privileges.
- Drop capabilities you don’t want (e.g.,
Capabilities are your surgical tool for granting just enough privilege, whether that’s binding to a low port, tweaking networking, or blocking risky syscalls.
Final Thoughts: Why Capabilities Matter
From the early days of Linux, privilege was an all-or-nothing deal, UID 0 could do everything, everyone else got EPERM. That simplicity came at a cost: giving a process one privileged action meant giving it all of them.
Linux 2.2’s introduction of capabilities changed that. Privilege could now be split into fine-grained units like CAP_NET_BIND_SERVICE or CAP_SYS_PTRACE, tied directly to specific syscalls. Our NET_BIND example showed how this plays out in practice:
- Root-only service: Works, but comes with every privilege.
- Capability-only service: Works for the intended action (binding port 80) without extra power.
- No capability: Fails as expected.
When we moved into containers, the same principle held:
Docker and Kubernetes both start with a reduced set of capabilities for root, and both let you add or drop individual privileges. Our tests showed:
- Dropping
CAP_CHOWNremoves the ability to change file ownership, even for root. - Without
CAP_NET_ADMIN, network device management fails withOperation not permitted. - Adding just the required capability restores the intended function without re-granting full root.
The takeaway: capabilities are one of the cleanest ways to shrink your attack surface without breaking legit workloads. I think of them as a firewall for syscalls. You can allow only what you need, block everything else, and never give away more than necessary.