Service Boundaries: The Cilium Way
When Network Policy Meets Observability
Working as a solutions architect while going deep on Kubernetes security — prevention-first thinking, open source tooling, and a daily rabbit hole of hands-on learning. I make the mistakes, then figure out how to fix them (eventually).
In Part 2 we leveled up from basic NetworkPolicy to better cluster-wide guardrails using Calico. With global defaults and flow logs, we built something that worked.
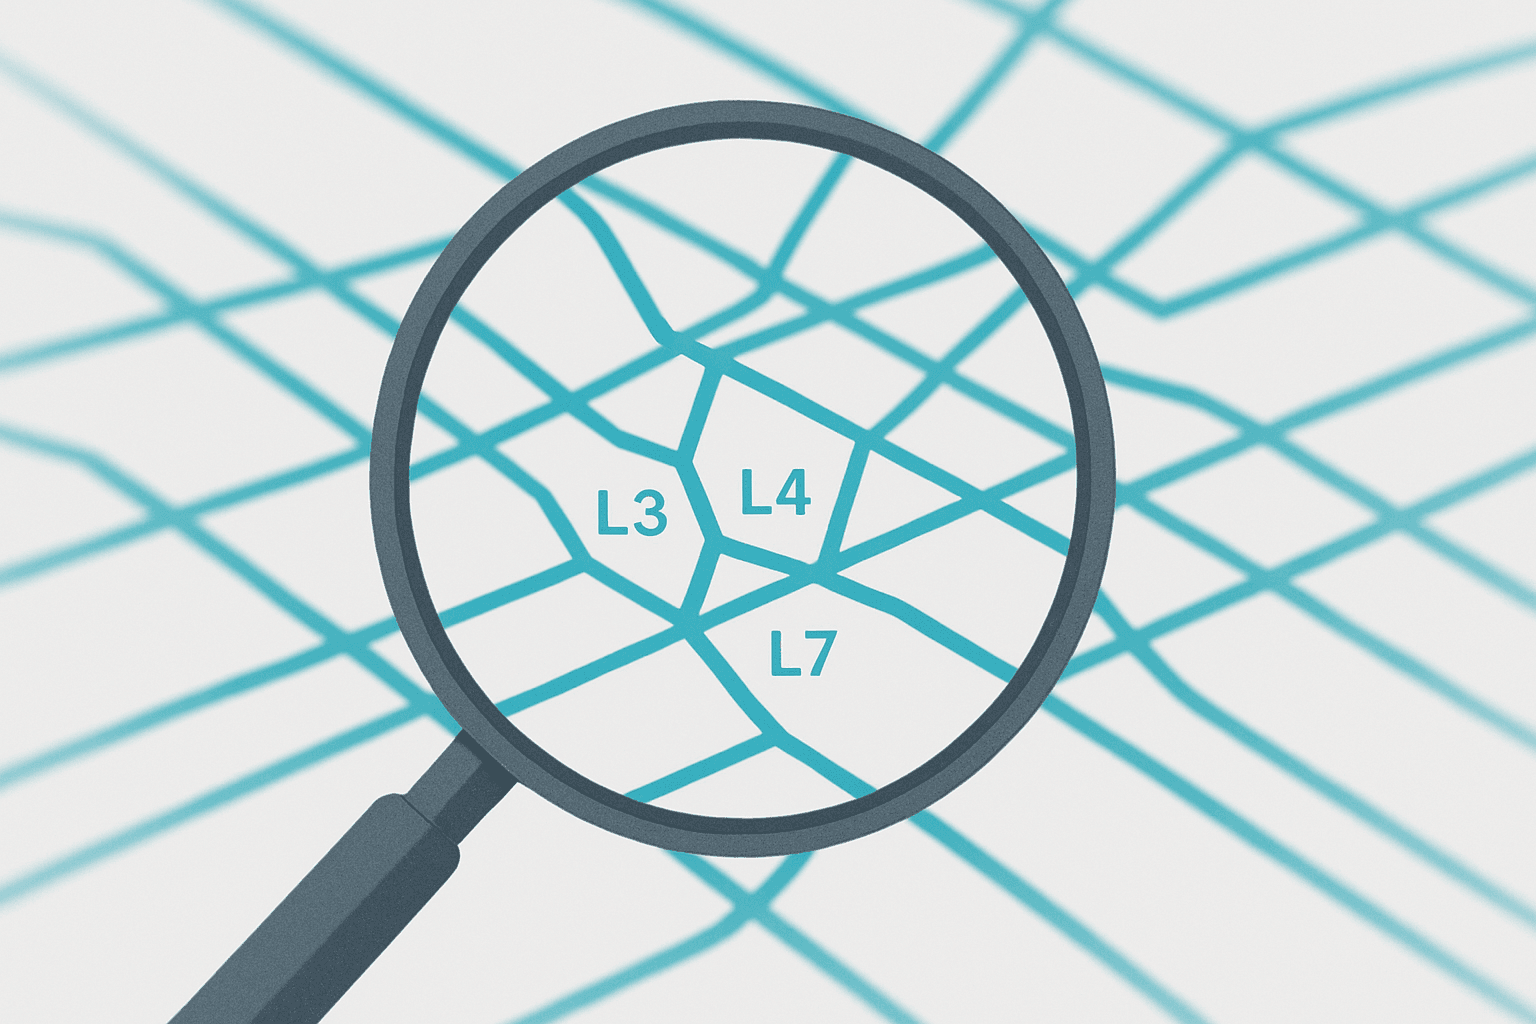
That’s a solid foundation. Sounds a bit like what I thought of Network Policies before Calico. But let’s be honest, we’re still only seeing half the picture. Calico and native NetworkPolicy both stop at L4: ports, IPs, and namespaces. Useful, but blind to what’s actually happening inside the connection. Was that a harmless health check or an attacker probing?
This is where Cilium steps in. It takes the same “who can talk to whom” model and extends it into “what can they do once connected.”
L7 enforcement for HTTP, gRPC, Kafka, and DNS.
Identity-aware policies that track labels, not IPs.
Hubble observability so you can see and debug traffic at every layer.
In other words, Cilium isn’t replacing Calico — it’s turning your network policies into application-aware security. Think of it as moving from guardrails to actual understanding. Let's get to it.
Quick note: you’re not going to run Calico and Cilium together. They’re both CNIs, and this series focuses on boundaries, not datapath diplomacy. If you’re already all-in on Calico, this post is more about curiosity than configuration.
What the Hell Is Cilium?
If you’ve spent any time around Kubernetes networking, you’ve seen Cilium pop up. Yes, I said that before about Calico, but it's true. I would describe it as the CNI for cool kids, exuding eBPF goodness. But strip away my sarcasm, and it's actually pretty interesting.
Cilium isn’t just a CNI plugin. It’s a networking, security, and observability platform built on the Linux kernel’s extended Berkeley Packet Filter (eBPF) technology. Instead of using traditional iptables chains or Calico’s Felix agent to program kernel rules, Cilium compiles policies directly into lightweight, event-driven eBPF programs. Check out the link if you’re need an eBPF primer.
At its core, Cilium provides three big things:
Networking — a full CNI that routes packets using eBPF.
Security — identity-based rules that enforce at L3, L4, and now L7.
Observability — deep visibility into traffic, powered by Hubble.
Because enforcement happens in the kernel, Cilium can see and understand every packet and flow, not just the ones that bubble up through Kubernetes Services. That’s what makes features like L7-aware HTTP and DNS policies possible without something like a service mesh.
If Calico was your scalable network policy engine, Cilium is your intelligent network policy engine. It understands intent and context, not just ports and IPs.
Deploying Cilium (ARM-friendly edition)
There are a few ways to set up Cilium for a lab. The easiest is to start with a fresh Ubuntu VM running Kubernetes 1.33. Talos is an option now, but we’ll stick with the usual full-control setup. You can follow along with the Kubernetes on Mac M1 article up to the point where we install Calico. Also, update Kubernetes 1.31 to 1.33 to keep things current.
Start by downloading Cilium and extracting it to /usr/local/bin for easy use. Just to note, we're using ARM, but you can easily swap this out if you're not on this architecture.
matt@ciliumcontrolplane:~$ curl -L --remote-name https://github.com/cilium/cilium-cli/releases/latest/download/cilium-linux-arm64.tar.gz

sudo tar xzvf cilium-linux-arm64.tar.gz -C /usr/local/bin
Then use the following to install Cilium.
matt@ciliumcontrolplane:~$ cilium install --version 1.16.5
ℹ️  Using Cilium version 1.16.5
🔮 Auto-detected cluster name: kubernetes
🔮 Auto-detected kube-proxy has been installed
And don’t forget to remove your taint if you’re doing this on a single-node cluster and haven’t already. I almost always forget this one.
matt@ciliumcontrolplane:~$ kubectl taint nodes --all node-role.kubernetes.io/control-plane-
You can verify everything’s up by checking that the Cilium components are running in the kube-system namespace — or by running a cilium connectivity test. (I tried the test; it tried my patience. I killed it.)
matt@ciliumcontrolplane:~$ kubectl get po -A
NAMESPACE     NAME                                         READY   STATUS    RESTARTS   AGE
kube-system   cilium-9vxrz                                 1/1     Running   0          88s
kube-system   cilium-envoy-rnfsc                           1/1     Running   0          88s
kube-system   cilium-operator-799f498c8-lm989              1/1     Running   0          88s
kube-system   coredns-674b8bbfcf-5lxq8                     1/1     Running   0          6m5s
kube-system   coredns-674b8bbfcf-92xvg                     1/1     Running   0          6m5s
kube-system   etcd-ciliumcontrolplane                      1/1     Running   0          6m12s
kube-system   kube-apiserver-ciliumcontrolplane            1/1     Running   0          6m13s
kube-system   kube-controller-manager-ciliumcontrolplane   1/1     Running   0          6m12s
kube-system   kube-proxy-v97vg                             1/1     Running   0          6m5s
kube-system   kube-scheduler-ciliumcontrolplane            1/1     Running   0          6m13s
Now we're ready to roll.
From Install to Insight — Baseline Cilium Behavior
Now that Cilium’s up and running, let’s see what it actually does out of the box. Turns out not much. So the cool stuff has to wait a little. Like every other Kubernetes CNI, Cilium starts in “wide-open” mode until you tell it otherwise. No policies, no restrictions — a free for all. No different than Calico-world in this regard. Let’s verify that before we start locking things down.
Baseline Connectivity Test
We’ll use the same simple three-tier app we’ve been deploying since Part 1. Save the following as test-app.yaml. Yes, this is long.
apiVersion: v1
kind: Namespace
metadata:
  name: frontend
  labels:
    tier: frontend
---
apiVersion: v1
kind: Namespace
metadata:
  name: backend
  labels:
    tier: backend
---
apiVersion: v1
kind: Namespace
metadata:
  name: db
  labels:
    tier: db
---
apiVersion: apps/v1
kind: Deployment
metadata:
  name: web
  namespace: frontend
  labels:
    app: web
spec:
  replicas: 1
  selector:
    matchLabels:
      app: web
  template:
    metadata:
      labels:
        app: web
    spec:
      containers:
        - name: nginx
          image: nginx:1.27-alpine
          ports:
            - containerPort: 80
---
apiVersion: v1
kind: Service
metadata:
  name: web
  namespace: frontend
spec:
  selector:
    app: web
  ports:
    - name: http
      port: 80
      targetPort: 80
      protocol: TCP
---
apiVersion: apps/v1
kind: Deployment
metadata:
  name: api
  namespace: backend
  labels:
    app: api
spec:
  replicas: 1
  selector:
    matchLabels:
      app: api
  template:
    metadata:
      labels:
        app: api
    spec:
      containers:
        - name: nginx
          image: nginx:1.27-alpine
          ports:
            - containerPort: 80
---
apiVersion: v1
kind: Service
metadata:
  name: api
  namespace: backend
spec:
  selector:
    app: api
  ports:
    - name: http
      port: 80
      targetPort: 80
      protocol: TCP
---
apiVersion: apps/v1
kind: Deployment
metadata:
  name: postgres
  namespace: db
  labels:
    app: postgres
spec:
  replicas: 1
  selector:
    matchLabels:
      app: postgres
  template:
    metadata:
      labels:
        app: postgres
    spec:
      containers:
        - name: postgres
          image: postgres:15-alpine
          env:
            - name: POSTGRES_PASSWORD
              value: pass
          ports:
            - containerPort: 5432
---
apiVersion: v1
kind: Service
metadata:
  name: postgres
  namespace: db
spec:
  selector:
    app: postgres
  ports:
    - name: pg
      port: 5432
      targetPort: 5432
      protocol: TCP
And apply.
kubectl apply -f test-app.yaml
Then run a quick shell in the frontend namespace and test connectivity.
kubectl run -n frontend test --image=ghcr.io/nicolaka/netshoot -it --rm -- bash

curl -sI http://api.backend.svc.cluster.local
nc -vz postgres.db.svc.cluster.local 5432
dig +short kubernetes.default.svc.cluster.local
You should see something similar to the following.
matt@ciliumcontrolplane:~$ kubectl run -n frontend test --image=ghcr.io/nicolaka/netshoot -it --rm -- bash
If you don't see a command prompt, try pressing enter.
test:~# curl -sI http://api.backend.svc.cluster.local
HTTP/1.1 200 OK
Server: nginx/1.27.5
Date: Mon, 06 Oct 2025 14:32:10 GMT
Content-Type: text/html
Content-Length: 615
Last-Modified: Wed, 16 Apr 2025 12:55:34 GMT
Connection: keep-alive
ETag: "67ffa8c6-267"
Accept-Ranges: bytes

test:~# nc -vz postgres.db.svc.cluster.local 5432
Connection to postgres.db.svc.cluster.local (10.101.1.16) 5432 port [tcp/postgresql] succeeded!
test:~# dig +short kubernetes.default.svc.cluster.local
10.96.0.1
Everything should work: HTTP to backend, TCP to Postgres, DNS lookups. Cilium enforces nothing yet, so traffic flows freely between namespaces and pods. And our test environment is purring (I guess that is more Calico, but you get the point).
Cilium NetworkPolicy Primer
So now let's see what Cilium's got for its NetworkPolicy. Cilium introduces its own CRD: CiliumNetworkPolicy (CNP). It extends Kubernetes NetworkPolicy with L7 context and identity-based enforcement — meaning it can match flows not only by port and IP, but also by service name, HTTP verb, or DNS pattern.
Here’s the simplest possible CNP: a namespace-scoped default-deny. Save the following as cnp-default-deny.yaml. It uses Cilium’s explicit deny fields (ingressDeny and egressDeny) to ensure traffic is actually blocked.
apiVersion: cilium.io/v2
kind: CiliumNetworkPolicy
metadata:
  name: cnp-default-deny
  namespace: frontend
spec:
  endpointSelector: {}
  ingressDeny:
    - {}
  egressDeny:
    - {}
Apply it.
kubectl apply -f cnp-default-deny.yaml
Now all the same curl or dig commands fail. No ingress, no egress, no DNS. Welcome to zero-trust networking. Insert sad face.
Note that unlike a standard NetworkPolicy, leaving ingress and egress empty in Cilium doesn’t automatically enforce a deny-all posture. Cilium only turns on enforcement when a rule or explicit deny exists. The version we used guarantees both directions are blocked until you start carving out allows.
If you’re curious what policies are active, just check the policies.
kubectl get cnp -n frontend
Observing Without Hubble (More on that later)
Right now, we’re flying blind. We have no logs, no flow data, just blocked packets. That’s fine; we’ll turn on Hubble soon for x-ray-vision-level (see the cool kid) insight into what’s happening under the hood. For now, the takeaway is simple: Cilium enforces deny/allow semantics just like Calico or native NetworkPolicy.
But, Cilium can express policies with far more context than ports. For example, an egress rule that allows DNS lookups through CoreDNS, matching on protocol and even query patterns. We’ll come back to this when we enable Hubble.
Rebuilding the Three-Tier Flows Under Cilium
Now that Cilium is enforcing properly, we can mirror the same three-hop app flows we created earlier: frontend → backend → database, plus DNS egress. This will give us a clean baseline before enabling Hubble and exploring L7.
1. Deny-All in Each Namespace
Save the following as cnp-deny-all.yaml. This will shut down all traffic in and out for each of our three namespaces, not just frontend.
apiVersion: cilium.io/v2
kind: CiliumNetworkPolicy
metadata:
  name: default-deny
  namespace: frontend
spec:
  endpointSelector: {}
  ingressDeny: [ {} ]
  egressDeny:  [ {} ]
---
apiVersion: cilium.io/v2
kind: CiliumNetworkPolicy
metadata:
  name: default-deny
  namespace: backend
spec:
  endpointSelector: {}
  ingressDeny: [ {} ]
  egressDeny:  [ {} ]
---
apiVersion: cilium.io/v2
kind: CiliumNetworkPolicy
metadata:
  name: default-deny
  namespace: db
spec:
  endpointSelector: {}
  ingressDeny: [ {} ]
  egressDeny:  [ {} ]
And apply.
kubectl apply -f cnp-deny-all.yaml
2. Allow DNS Egress Globally
Save the following as ccnp-allow-dns.yaml. This will allow CoreDNS to access the outside world. Notice this is a CiliumClusterwideNetworkPolicy. Nothing special, just not namespaced and gives NodeSelector capabilities.
apiVersion: cilium.io/v2
kind: CiliumClusterwideNetworkPolicy
metadata:
  name: allow-coredns-egress
spec:
  endpointSelector:
    matchLabels:
      k8s:io.kubernetes.pod.namespace: kube-system
      k8s:k8s-app: kube-dns
  egress:
    - toEntities:
        - kube-apiserver
      toPorts:
        - ports:
            - port: "443"
              protocol: TCP
    - toEntities:
        - world
      toPorts:
        - ports:
            - port: "53"
              protocol: UDP
            - port: "53"
              protocol: TCP
And apply.
kubectl apply -f cnp-dns-egress.yaml
3. Allow DNS Egress per Namespace
We'll need to also allow each namespace DNS egress. Save the following as cnp-ns-dns.yaml.
apiVersion: cilium.io/v2
kind: CiliumNetworkPolicy
metadata:
  name: allow-dns-egress
  namespace: frontend
spec:
  endpointSelector: {}
  egress:
    - toEndpoints:
        - matchLabels:
            k8s:io.kubernetes.pod.namespace: kube-system
            k8s:k8s-app: kube-dns
      toPorts:
        - ports:
            - port: "53"
              protocol: UDP
            - port: "53"
              protocol: TCP
---
apiVersion: cilium.io/v2
kind: CiliumNetworkPolicy
metadata:
  name: allow-dns-egress
  namespace: backend
spec:
  endpointSelector: {}
  egress:
    - toEndpoints:
        - matchLabels:
            k8s:io.kubernetes.pod.namespace: kube-system
            k8s:k8s-app: kube-dns
      toPorts:
        - ports:
            - port: "53"
              protocol: UDP
            - port: "53"
              protocol: TCP
---
apiVersion: cilium.io/v2
kind: CiliumNetworkPolicy
metadata:
  name: allow-dns-egress
  namespace: db
spec:
  endpointSelector: {}
  egress:
    - toEndpoints:
        - matchLabels:
            k8s:io.kubernetes.pod.namespace: kube-system
            k8s:k8s-app: kube-dns
      toPorts:
        - ports:
            - port: "53"
              protocol: UDP
            - port: "53"
              protocol: TCP
And apply as usual.
kubectl apply -f cnp-ns-dns.yaml
4. App Flows: Frontend → Backend → DB
Save the following as cnp-front-to-back.yaml. This will allow our frontend to reach the backend.
apiVersion: cilium.io/v2
kind: CiliumNetworkPolicy
metadata:
  name: front-egress-to-back
  namespace: frontend
spec:
  endpointSelector: {}
  egress:
    - toEndpoints:
        - matchLabels:
            "k8s:io.kubernetes.pod.namespace": backend
            "k8s:app": api
      toPorts:
        - ports:
            - port: "80"
              protocol: TCP
---
apiVersion: cilium.io/v2
kind: CiliumNetworkPolicy
metadata:
  name: back-ingress-from-front
  namespace: backend
spec:
  endpointSelector:
    matchLabels:
      k8s:app: api
  ingress:
    - fromEndpoints:
        - matchLabels:
            "k8s:io.kubernetes.pod.namespace": frontend
      toPorts:
        - ports:
            - port: "80"
              protocol: TCP
Save the following as cnp-back-to-db.yaml. This will allow our backend to reach the database.
apiVersion: cilium.io/v2
kind: CiliumNetworkPolicy
metadata:
  name: back-egress-to-db
  namespace: backend
spec:
  endpointSelector: {}
  egress:
    - toEndpoints:
        - matchLabels:
            "k8s:io.kubernetes.pod.namespace": db
            "k8s:app": postgres
      toPorts:
        - ports:
            - port: "5432"
              protocol: TCP
---
apiVersion: cilium.io/v2
kind: CiliumNetworkPolicy
metadata:
  name: db-ingress-from-back
  namespace: db
spec:
  endpointSelector:
    matchLabels:
      k8s:app: postgres
  ingress:
    - fromEndpoints:
        - matchLabels:
            "k8s:io.kubernetes.pod.namespace": backend
      toPorts:
        - ports:
            - port: "5432"
              protocol: TCP
And apply to wrap up all the policies
kubectl apply -f cnp-front-to-back.yaml
kubectl apply -f cnp-back-to-db.yaml
5. Quick Tests
# Frontend → Backend (HTTP)
matt@ciliumcontrolplane:~/blog$ kubectl -n frontend run app --image=ghcr.io/nicolaka/netshoot -it --rm -- bash
If you don't see a command prompt, try pressing enter.
app:~# curl -sI http://api.backend.svc.cluster.local
HTTP/1.1 200 OK
Server: nginx/1.27.5
Date: Mon, 06 Oct 2025 21:49:48 GMT
Content-Type: text/html
Content-Length: 615
Last-Modified: Wed, 16 Apr 2025 12:55:34 GMT
Connection: keep-alive
ETag: "67ffa8c6-267"
Accept-Ranges: bytes

# Backend → DB (Postgres)
matt@ciliumcontrolplane:~/blog$ kubectl -n backend run app --image=ghcr.io/nicolaka/netshoot -it --rm -- bash
If you don't see a command prompt, try pressing enter.
app:~# nc -vz postgres.db.svc.cluster.local 5432
Connection to postgres.db.svc.cluster.local (10.101.1.16) 5432 port [tcp/postgresql] succeeded!
I think I did all of the right, but let me know if something is off. This is all pretty similar to what we've done before, but we've got to cover the bases. With traffic restored for the intended paths our app is looking nice and tidy. Onward and upward.
Lighting Up Hubble
We’ve got our service boundaries locked down. Now it’s time to actually see them in action. That’s where Hubble comes in: Cilium’s built-in observability layer that turns packet-level noise into readable flow context. And it just works.
Hubble runs as a Relay (for aggregation) and an optional UI (for pretty visuals).
We’ll use both.
Step 1: Enable Hubble
If you didn’t enable it during install, it’s just one command.
cilium hubble enable --ui
And you should see the following.
matt@ciliumcontrolplane:~/blog$ kubectl get po -n kube-system | grep hubble
hubble-relay-cdd887546-nxcs2                 1/1     Running   0          16h
hubble-ui-69d69b64cf-s6rj7                   2/2     Running   0          16h
This deploys:
hubble-relay– the data service that aggregates flow logs from each Cilium agenthubble-ui– a lightweight web frontend
Step 2: Access the Hubble UI
Expose it locally (for your Mac in this case) with a NodePort. This makes it accessible directly from your control plane node’s IP. Start by patching the service.
Oh but wait, that doesn't work because of the Operator pattern. This has happened with many tools so let's just create our own service that leaves the others undisturbed. So here is the hubble-service.yaml.
apiVersion: v1
kind: Service
metadata:
  name: hubble-ui-nodeport
  namespace: kube-system
spec:
  type: NodePort
  selector:
    k8s-app: hubble-ui
  ports:
    - name: http
      port: 8081
      targetPort: 8081
      protocol: TCP
      nodePort: 31080
---
apiVersion: v1
kind: Service
metadata:
  name: hubble-relay-nodeport
  namespace: kube-system
spec:
  type: NodePort
  selector:
    k8s-app: hubble-relay
  ports:
    - name: relay
      port: 8090
      targetPort: 8090
      protocol: TCP
      nodePort: 31083
And apply.
kubectl apply -f hubble-service.yaml
Then access the Hubble dashboard at:
http://<control-plane-node-ip>:31080
That’ll launch the UI dashboard. You’ll start seeing live flow logs:
FORWARDED — allowed by policy
DROPPED — denied by policy
With full context: source → destination, protocol, port, and verdict.
Step 3: Validate Our Flows
Now generate some traffic from the frontend namespace:
matt@ciliumcontrolplane:~/blog$ kubectl -n frontend run test --image=ghcr.io/nicolaka/netshoot -it --rm -- bash
If you don't see a command prompt, try pressing enter.
test:~# curl -sI http://api.backend.svc.cluster.local
HTTP/1.1 200 OK
Server: nginx/1.27.5
Date: Tue, 07 Oct 2025 03:25:44 GMT
Content-Type: text/html
Content-Length: 615
Last-Modified: Wed, 16 Apr 2025 12:55:34 GMT
Connection: keep-alive
ETag: "67ffa8c6-267"
Accept-Ranges: bytes

test:~# dig +short google.com
142.251.46.238
test:~# nc -vz postgres.db.svc.cluster.local 5432
^C
Back in Hubble, you’ll see some forwarded and some dropped as expected:

That’s Cilium showing you every flow in the frontend namespace. The graphics are not too bad as well. Easy as you like it.
L7 Enforcement
By now, we’ve seen Cilium handle L3/L4 segmentation cleanly. But the cool kid stuff is application-aware enforcement. It can look inside packets to understand requests by method and path. No sidecars, no service mesh, no YAML sorcery. Just a native policy that says: allow GET /healthz, block POST /admin.
Why L7?
With Calico, policies stopped at “TCP 80 from frontend to backend.” With Cilium, we can go further — controlling traffic by HTTP method, path, etc. That bridges the gap between network isolation and API protection.
Step 1: Create an L7-Aware Policy
Let's simply update our existing cnp-front-to-back.yaml:
apiVersion: cilium.io/v2
kind: CiliumNetworkPolicy
metadata:
  name: front-egress-to-back
  namespace: frontend
spec:
  endpointSelector: {}
  egress:
    - toEndpoints:
        - matchLabels:
            "k8s:io.kubernetes.pod.namespace": backend
            "k8s:app": api
      toPorts:
        - ports:
            - port: "80"
              protocol: TCP
          rules:
            http: [{}]
---
apiVersion: cilium.io/v2
kind: CiliumNetworkPolicy
metadata:
  name: back-ingress-from-front
  namespace: backend
spec:
  endpointSelector:
    matchLabels:
      k8s:app: api
  ingress:
    - fromEndpoints:
        - matchLabels:
            "k8s:io.kubernetes.pod.namespace": frontend
      toPorts:
        - ports:
            - port: "80"
              protocol: TCP
          rules:
            http: [{}]
We've just added the rules section below our ports. Simple. This is not to change anything with regards to allowed flows, but rather give us L7 visibility.
          rules:
            http: [{}]
Apply and test traffic from your frontend namespace:
matt@ciliumcontrolplane:~$  kubectl -n frontend run test --image=ghcr.io/nicolaka/netshoot -it --rm -- bash
If you don't see a command prompt, try pressing enter.
test:~# curl http://api.backend.svc.cluster.local/
<!DOCTYPE html>
<html>
<head>
<title>Welcome to nginx!</title>
<style>
html { color-scheme: light dark; }
body { width: 35em; margin: 0 auto;
font-family: Tahoma, Verdana, Arial, sans-serif; }
</style>
</head>
<body>
<h1>Welcome to nginx!</h1>
<p>If you see this page, the nginx web server is successfully installed and
working. Further configuration is required.</p>

<p>For online documentation and support please refer to
<a href="http://nginx.org/">nginx.org</a>.<br/>
Commercial support is available at
<a href="http://nginx.com/">nginx.com</a>.</p>

<p><em>Thank you for using nginx.</em></p>
</body>
</html>
test:~# curl http://api.backend.svc.cluster.local/h
<html>
<head><title>404 Not Found</title></head>
<body>
<center><h1>404 Not Found</h1></center>
<hr><center>nginx/1.27.5</center>
</body>
</html>
test:~#
The first call should succeed. The second returns a 404. So let's look at Hubble (ignore the double frontend).

L7 policies turn Kubernetes from ports and IPs into users and intent. Instead of treating every HTTP request equally, Cilium gives you relevant info. In our case we just see some Get requests with the specific endpoint, but that is actually pretty useful.
Wrapping Up Cilium
I've just scratched the surface with Cilium, so I'll revisit it in the future. But, the Cilium lab shows what happens when you bring intent and observability into the mix. It understands what's being said. By combining kernel-level eBPF hooks with L7 awareness, you get clarity.
If Calico was about scaling guardrails, Cilium is about seeing and understanding them in real time. You can trace every flow, correlate it to a policy, and confirm that what’s allowed is actually what you meant to allow.
My Key takeaways:
L7 visibility: HTTP and DNS insight without the overhead of a service mesh.
Hubble: observability built-in, not bolted on.
Cilium brings a lot of value.
Ready to Forget NetworkPolicy
Three parts, three layers of understanding:
| Layer | Tool | Scope | What It Taught Us |
| L3/L4 | NetworkPolicy | Namespace | Basic segmentation |
| L3–L4+ | Calico | Cluster | Global guardrails + visibility |
| L3–L7 | Cilium | Kernel | Context-aware enforcement + observability |
Kubernetes service boundaries aren’t about walls. NetworkPolicy gave us the foundation. Calico helped us scale it. Cilium made it slightly more intelligent. That's a wrap for now.